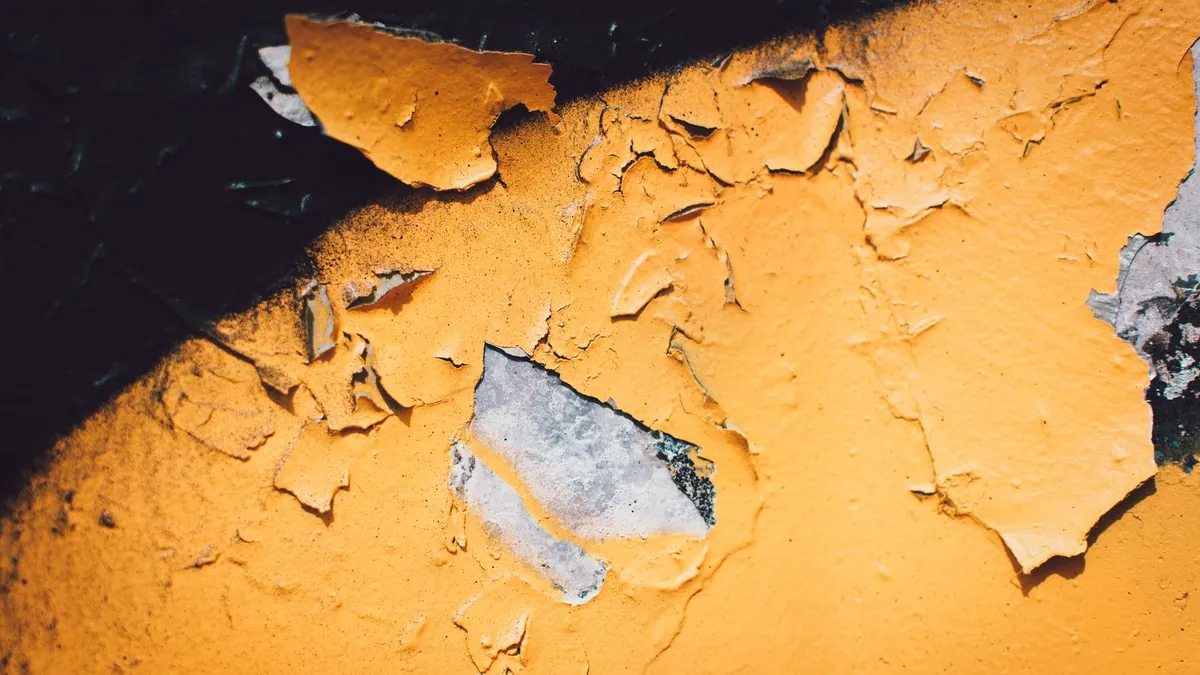
Paint rarely peels because it was cheap paint. It peels because it lost its grip on whatever is underneath it, and that usually comes down to two things: water finding its way behind the film, or a surface that the paint was never able to stick to in the first place. Repainting the wall without dealing with either one simply buys you another peeling wall with a fresher color.
The good news is that the diagnosis is straightforward once you know what to look for, and the repair follows the same order every time: stop the moisture, rebuild the bond, then paint.
Peeling is a bond failure, not a paint failure
A sound paint film is a thin, flexible skin that moves with the surface below it. Peeling starts when that bond breaks in one spot and moisture or air gets in behind the film, lifting a wider and wider area. That is why a small flake near a ceiling corner can become a peeling sheet a meter wide within a few months, and why painting over peeling paint never works: the new coat bonds to the old one, and the old one is the part that is failing.
The four causes behind almost every peeling wall
1. Moisture moving from behind the paint
This is the most common cause of premature paint failure on wood, and it explains most interior peeling too. Water vapor from showers, cooking, laundry and even breathing travels into walls and ceilings, hits a cooler surface, and pushes the paint off from the inside. Outside, the same thing happens with rain driven into siding, blocked gutters, failed flashing, ice dams at the roof edge, and hose spray against a wall.
Purdue University Extension lists excess moisture as the most common cause of premature paint failure on wood, and notes that vapor moving from inside the house to the outside is just as damaging as rain and dew hitting the surface.
Blistered paint that is soft, damp or stained underneath is the signature of this problem. So is peeling that keeps returning in exactly the same place after every repaint.
2. A surface the paint cannot grab
Paint needs a clean, dull, dry surface. Dust from sanding, kitchen grease, soap film, chalky residue from an old weathered coat, and wallpaper paste all sit between the new paint and the wall. Painting over a damp surface, or painting in cold or damp weather, causes the same failure.
Old glossy finishes are another frequent offender. An alkyd or oil based gloss that was never sanded or dulled gives latex paint very little to hold onto, and the result is peeling in strips that come away cleanly.
3. The wrong coating over the wrong coating
Coating systems have to work together. A hard, brittle finish over a soft, flexible one will crack and flake as the two layers expand and contract at different rates. Oil over latex, or a heavy exterior enamel applied over a flexible acrylic, is a common combination that fails early.
The practical rule is simple: sand and prime before switching product types, and stay within one manufacturer’s system where you can.
4. Too many coats, and no way for vapor to escape
Every additional layer makes the film less permeable to water vapor. Once the film is too thick, trapped moisture has nowhere to go and pressure builds up behind the paint until it blisters and peels. Old, brittle layers underneath make things worse, because they can no longer move with the wood or plaster as the seasons change.
Match the symptom to the cause
| What you see | Most likely cause | Fix first |
|---|---|---|
| Large soft bubbles, peeling in sheets, damp patch under the film | Water getting in from behind | Find and stop the leak, vapor or condensation |
| Paint peeling in strips, clean surface underneath | Glossy or greasy surface, no primer | Wash, dull the gloss, prime, repaint |
| Peeling inside a bathroom, above a shower or around a window | Condensation on a cool surface | Improve ventilation and insulation |
| Peeling in one recurring spot no matter how often you repaint | An unfixed moisture source | Water, always water |
| Fine cracks over a thick, hard film, then flaking | Too many brittle coats | Strip back, sand, rebuild with primer |
Check for lead paint before you scrape
If the building was constructed before 1978, treat painted surfaces with respect until you know what is on them. EPA’s Renovate Right guidance explains that federal law requires contractors disturbing painted surfaces in pre-1978 homes and child care facilities to be certified and to follow lead-safe work practices, and that the rules apply to renovation work as small as six square feet of interior painted surface in a room.
For a homeowner, that means avoiding dry scraping and power sanding, keeping children and pets out of the room, working with wet methods where possible, and hiring a certified firm for anything more than a small repair. A low cost test kit settles the question before work starts.
How to repair peeling paint, step by step
- Fix the water source first. Repair the leak, clear the gutter, improve the ventilation, or move the water away from the wall. Peeling paint always comes back if this step is skipped, and it will come back faster than the first time.
- Protect the room. Move furniture, cover the floor, and tape plastic over doorways if you are scraping a large area.
- Scrape back to sound paint. Work a stiff scraper in every direction until the edges stop lifting, then feather the transition between bare surface and sound paint so it does not show under the new coat.
- Sand and clean. Sand the bare spots and any glossy edges, then wash off dust, grease and chalk. Rinse and let the surface dry completely, which takes longer than people expect in a bathroom or kitchen.
- Fill and flatten. Patch dents, nail holes and cracks with a filler suitable for the surface, then sand smooth.
- Prime the bare and repaired areas. Primers bond to raw wood, filler and old paint far better than a topcoat does, and a stain blocking or bonding primer also stops old stains from bleeding through.
- Repaint the whole panel or wall. Cut in the edges, roll in a consistent direction, and keep within the temperature range printed on the can. Two thin coats beat one thick coat every time.
For a living room wall, it is worth planning the room while the furniture is out of the way; a fresh coat of paint is easier to work with when the layout is settled, and the arrangements in this guide to small living room layouts are easy to test on paper first.
Keeping it from coming back
- Ventilate. Run bathroom and kitchen extractor fans after use, and check that they exhaust outside rather than into the attic.
- Watch the outside of the house. Clear gutters, check flashing and downpipes, and keep soil and mulch away from siding.
- Wash exterior paint once a year, since dirt and mold hold moisture against the film.
- Never paint over a damp surface, and avoid painting in cold or humid weather.
- Repair small flakes early. A ten minute touch up is cheaper than a full repaint.
Once the room is dry again, greenery is the quickest way to make a repainted wall feel finished, and the ideas in this guide to styling houseplants in a room work in almost any space.
The short version
Peeling paint is a message, not a cosmetic problem. Work out whether water is getting in behind the film or the surface was never prepared properly, fix that cause, then scrape, prime and repaint. Skip the cause and the new coat fails on the same schedule as the old one.